I know it has been a long time between blogs recently. Been busy flying!
I saw an advertisement in the
NAFI Mentor magazine for CFIs to take demonstration flights in Cirrus aircraft. Obviously this is intended to introduce CFIs to the capabilities of Cirrus aircraft so that we can make informed recommendations to clients. I figured, why not?
Well, a few days ago I had the pleasure of taking a beautiful 2015 Cirrus SR22T GTS Xi up on a demo flight with Jeff Sandusky, Regional Sales Director for Cirrus Aircraft. Based at Wiley Post Airport in Oklahoma City, this is a special airplane. Not only because it is the top of the line Cirrus model, it is also the 6000th aircraft Cirrus has produced, and therefore has some definite "appearance" upgrades (seats, trim, etc.). This aircraft has the G1000 panel with 12" screens, synthetic vision, infrared enhanced vision, air conditioning, built-in oxygen, ADS-B in/out traffic and weather, FIKI, dual AHRS, Envelope Protection, XM music and about a million other features. I was pretty excited to step on in and take it up!
 |
| My chariot for the morning! |
Given that it was a breezy 32 or so degrees outside, Jeff gave me a brief (but still thorough) look at some of the exterior features of this airplane. I was especially interested in the stall protection designed into the wing, in a few distinct locations.
The wing root has a large vortex generator that controls airflow over the root of the wing. The first stall strip ensures that the stall starts there, inboard, and not further out.
 |
| I wonder how many people have accidentally stepped on that vortex generator? It's really perfectly positioned to be a step. |
At about mid-wing there is a noticeable break in the leading edge that causes the outboard portion of the wing to have a lower angle of incidence than the inboard portion, so aileron control is maintained while the inboard portion is stalled. I got to test out the stall characteristics later in the flight.
 |
| Cirrus wings look funny, but it's all about stall control. |
With all the custom appearance options, the interior was very nice. The seat was noticeably firm at first, but after some initial commenting, I did not notice or think about it for the rest of the flight. The 4-point harness made me feel secure, though it did have a tendency (as these do) to ride up if not adjusted tight enough. Maybe that's just a signal to tighten it? This harness was equipped with airbags in each shoulder strap.
 |
| Nice high quality leather and styling touches awaited me. |
The back seat was the "60/40 Flex Seating" split seat designed for three passengers. Clearly for three to fit, these must be smaller passengers, children, or very friendly with each other.
 |
| I cannot report on the comfort of the back seat! |
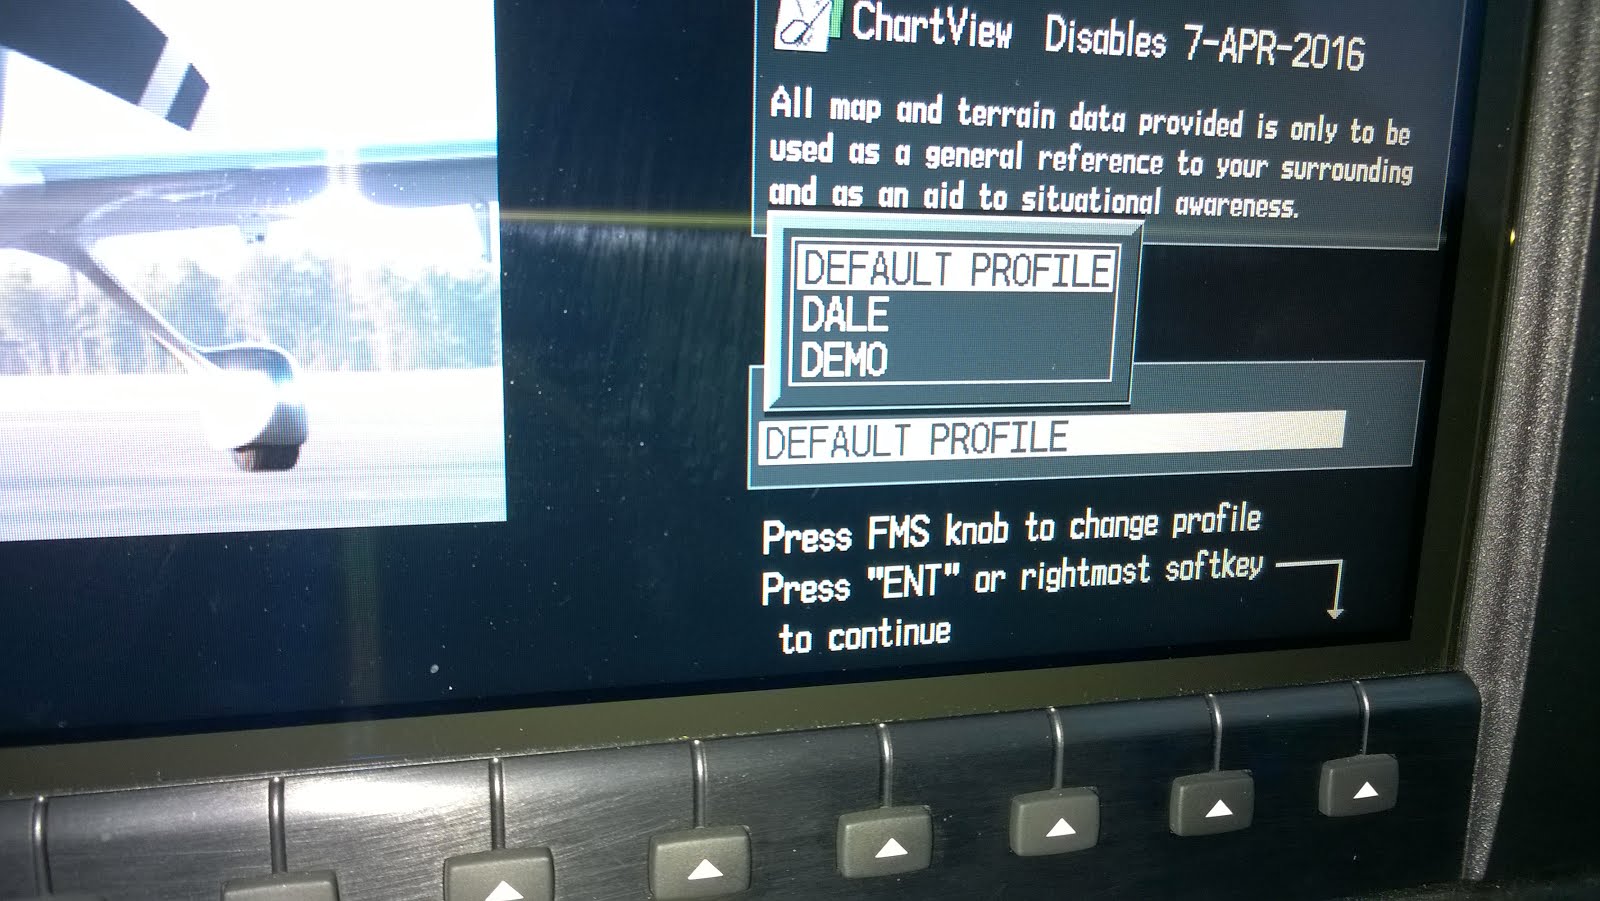
As someone who flies "club" airplanes a lot, I really liked the ability of the G1000 to store up to 25 user profiles for screen setup and configuration.
 |
| Want a different configuration for IFR and VFR? Local and longer flights? No problem! |
I quickly figured out that this handle was not a door handle or something to pull on to help adjust my seat! This is, of course, the Cirrus Aircraft Parachute System handle overhead. The parachute has a minimum deployment altitude of 600 AGL. Above that, standard Cirrus training is for the parachute to be pulled immediately in the event of any serious malfunction up to 2000 AGL. Above 2000 AGL, Cirrus trains pilots to go ahead and troubleshoot before pulling the parachute.
 |
| Fortunately we didn't have to pull this, although that would have certainly made for a very interesting article! |
What is this? An actual keyboard in a light single! No more twisting knobs to enter waypoints or frequencies. Most of the other radio and autopilot functions are replicated on this center console as well. Note the blue "LVL" button in the middle. More about that later. The keyboard would take some getting used to, as it's not a QWERTY layout. But it's still faster than turning knobs to enter airports or intersections.
 |
| Almost all of the controls you need within easy reach of your right hand. |
Ah, standby instruments! Situated right above the pilot's knees. In this model, they are all digital. The altimeter setting can be slaved to the primary display, so you only need to set it once. Nice.
 |
| Previous versions had analog instruments, but these were all digital. |
Okay, enough about the systems. You know that I was really ready to fly this thing! Due to a solid cloud layer from about 2800 MSL (1500 AGL) to 4000 MSL or so, we had filed IFR. The temperature was right around freezing so there was the chance of some ice - however with the TKS weeping-wing system this Cirrus is approved for Flight Into Known Icing. We quickly popped above the layer and tried to negotiate a block altitude and area for maneuvering from Oklahoma City Approach - but they weren't having any of that (unusual, I've requested and received this many times before). So we headed north 30 miles or so until we entered Kansas City Center's airspace and made the same request - no problem!
At this point Jeff ran me through a pretty thorough demo flight - explaining the capabilities, letting me experience the handling and systems, and stressing the myriad safety features on the airplane.
First, cruise. At 10,000 feet, 30.3 inches of MP equaled 87% power (easy to set with the single-lever power control). This gave us 18.7 gph and a TAS of 183 kts, which is right at book value. As this is the turbo model, TAS gets faster up into the Flight Levels where 210+ KTAS is achievable. Obviously this is a high cruise power setting and 75% or 65% power settings will result in slower airspeeds but commensurately lower fuel burns.
On the MFD I need to point out the leaning procedure - you lean the mixture until the fuel flow is at the blue line (left side of the screen, 1/3 of the way down). That's it - simple.
Time for a little hand-flying, though. I found the stick forces and response to be both interesting and exciting. Gentle pressure on the controls resulted in equivalently gentle maneuvering of the airplane and it felt "normal". Move the stick a little more than normal, for quick maneuvering, and the whole personality of the airplane changed - response was quick, solid and immediate. More "aerobatic-like" than the traditional single-engine airplane feel. This is enhanced by the control system having a spring-return to neutral.
Handling and stability in the stall was fantastic. There was no tendency to drop a wing and the ailerons remained effective throughout the stall. This really felt like an affront to my traditional stall experience, as I teach using the rudders to keep the wings level in a stall for the usual reason of spin avoidance. But in this airplane, it was no problem. Sure felt weird though.
The Perspective system includes Garmin's "Electronic Stability and Protection" system, ESP, which I got to give a thorough workout. This system "helps" the pilot avoid unusual attitudes by assisting in returning the airplane to normal attitudes using the autopilot servos (even though the autopilot is off). With the ESP system on, banks of up to 45 degrees are normal. Past that the airplane pushes back, and keeps pushing until bank is at 30 degrees. This push is definitely noticeable but easily overcome if you want to - just push the stick a little harder and it will let you do what you're trying to do. However, there will be no mistaking that you are exceeding its built in parameters. The same is true for pitch, with different limits. The ESP system can be temporarily disengaged by simply holding the autopilot disconnect button on the stick, if needed for maneuvering.
Jeff did an interesting demo of the ESP system. While holding the plane level, he increased the aileron trim to full left, trimmed full nose down and added full power. When he released the stick, the airplane immediately rolled to the left and the nose pitched down as expected. (I say "as expected". I lie a little. Although he warned me what it was going to do beforehand, and conceptually of course I knew wat was going to happen, having an airplane roll hard to the left and dive with nobody holding the controls was certainly weird and a little uncomfortable.) Once it got past 45 degrees of bank, the airplane tried to right itself in bank. Simultaneously, as the nose lowered and the speed built up rapidly, the airplane tried to fix that too, using the only tool it had available - pitch (no autothrottles, yet). The aircraft pulled up surprisingly hard in an attempt to limit the airspeed gain - I'd say about 2 g's but can't find that in the POH. After a few oscillations it returned to a "normal" pitch and bank attitude and held it there. Not to straight and level flight, but within the established parameters for pitch and bank.
That's what this next thing is for - the GFC 700 autopilot has the "blue level button" which I got to press a couple of times. It does as advertised - returns the airplane to straight and level flight from whatever strange attitude you've managed to get into. More than just an emergency button though, I could see it as useful when hand flying and having to copy down an ATC clearance or other similar temporary distraction.
I really like these features from a safety standpoint. It would be very hard to not notice getting into an unusual attitude (for example through spatial disorientation), and the airplane would keep trying to get you back to normal, both helping you and giving you the tools to do it yourself. Great stuff.
At this point I really wanted to see the airplane on approach, especially the "Highway in the Sky" symbology since the last aircraft I flew with a G1000 didn't have that option.
Back into the cloud deck, we did pick up just the slightest trace of rime on the leading edges. Not enough to bother with engaging the TKS system, though of course we watched it closely for further accumulation.
 |
| Just the tiniest little bit of ice if you look closely. |
Cleared for the RNAV (GPS) RWY 35R approach into Wiley Post (KPWA), we intercepted the glideslope and started on down. Of course the autopilot is fully integrated and can fly the whole procedure hands-off with the pilot only making power changes and then flaring to land. But I was most interested in the "Highway in the Sky". "Flight simulator" computer programs as far back as the 1980's had HITS depictions as a "futuristic" guidance option. Well, now it's the future, and HITS is here! When hand flying an approach, all the pilot has to do is keep the flight path marker (green circle with crosshairs) within the magenta squares, pointed at the runway and it will be a perfect approach every time.
 |
| With all these navigational aids, it would be hard to go wrong. |
Short final was flown at 80 kts, and the landing was straightforward and uneventful (fortunately!) with a different sight picture than many single-engine pilots are used to. The nose drops away and the panel is low, so the impression is that you need to pull back more than you really do. It's like some twins in that regard - you feel like you're landing flat but you aren't.
A few takeaways:
- I can see why these airplanes are so popular.
- The integration of all the aircraft systems was amazing to me. Like many pilots I am used to an almost random array of instrumentation from different eras and manufacturers in the airplanes I routinely fly. In this airplane, everything talks to each other.
- The handling was enjoyable. The sidestick took exactly zero time to get familiar with.
- The seating position felt a little odd at first (very high up for me). I did wish the seats had more adjustability, but I stopped noticing as soon as we started moving and promptly forgot about it, so apparently this wasn't as big a deal as I thought.
- I can't believe I forgot to test the enhanced vision system!
- Getting in and out of the airplane took a different routine than I am used to and I'm sure I looked funny doing it.
- This aircraft would be a great (and quick) way to travel. 180+ KTAS and long range will get you many places.
- I need to convince Cirrus to let me evaluate this aircraft on a longer flight - with my wife. Say to Florida. Or Phoenix. Or anywhere warmer than Oklahoma this winter.
Many thanks to Jeff and Cirrus for giving me this great look into the capabilities of a fantastic airplane!